Saturday, August 8, 2015

First coat of Paint on the chassis

First coat of paint applied to the chassis.  Will probably do another coat, however I used rustoleum glossy black and from what I hear, you want to make sure the first coat is totally cured before putting the second coat on as the mineral spirits from the second coat can make the first coat paint bubble.  I'm OK with waiting, or maybe i'll put second coat on with a brush or roller.  Spraying went pretty good, used the excavator to hold the front up in the air (about 3' off the ground) so I could climb under to do the underside.  I think I only missed a couple little spots here and there underneath.


After the frame was back in the garage, I had a little bit of time tonight and I started sandblasting the firewall on the body and working my way around.  Boy it's amazing how long that one bag of sand lasted today after replacing the TIP on the blaster!  :)  Will post pictures tomorrow of what I get done, going to blast some more tomorrow.  I got about 4-5 more bags of sand to use.  I might also go pick up a rustoleum primer so I can apply it to the areas i've blasted so rust won't start forming on the bare metal.

Friday, August 7, 2015

Engine Out and ready for paint!

Ok so I pulled the engine out, used my other hoist to pull it off to the side out of the way so i wouldn't be working underneath it, nothing like working with a 800 lb engine directly overhead!

Then i finished welding my motor mounts permanently in place and added a few little pieces of steel to beef them up, ground welds and primed.


Lastly I cut out the remainder of the remnants of the old transmission crossmember and primed the rest of the chassis.  Ready for paint tomorrow or sunday.


Lastly I was at home depot today and I got this air spray gun set, only $65 for both guns and the entire nice kit.  I'm going to be using rustoleum oil based enamel (glossy black) to paint the frame.  We'll see how good it comes out, i've been reading online about people using it to paint the exterior of cars with some terrific results.  Think I might have to try!

Block Hugger Headers

So I bought this pair of block hugger headers to give me some more room all the way around, and for $90 from amazon, I wasn't expecting the best in the world, but these are pretty good for the money.  I didn't want chrome or anything so I got this pair of black headers.  They probably won't stay black forever, we'll see, but I have so much more room with them on for my steering rack on the drivers side and i can actually get the exhaust down under the frame on the passenger side while staying away from the starter.  Here are some pics, time to pull the engine/tranny out, finish welding engine mounts in place and then paint the chassis.  yay!


Wednesday, August 5, 2015

Couple things done while i wait for new exhaust headers...

Got a couple of things done over the past couple days while i wait for my block hugger exhaust headers to arrive.

Small thing - Fuel pump installed
Bigger things, found out I was supposed to use a rubber transmission mount and not bolt it solidly like I had originally done (it would be alot of vibrations, etc.), so I took off my transmission x-member and made a new one after getting the proper mount.  I had to bend the 1/4" angle iron (not that easy) to accomodate for the thickness of the rubber trans mount rather than go straight across.  So this started off as a straight piece of 2X2X1/4" angle iron:

And installed in the car, top view:

and rear view.  7/16" grade 8 bolts hold the X member to the frame (going to tack weld these heads to the top of the frame so that if i ever have to take my transmission out, I can easily remove the X-member) and 7/16" grade 8 bolts into the mount and into the transmission.  Good news, I had thought my transmission holes were stripped as the 3/8 bolts would tighten and then slip and pop out, well I think they were just filled with lots of crap that the bolt was holding onto and pulling out.  After reading online what the bolts were supposed to be, some people say metric, some people say 7/16 coarse thread, I'm not 100% sure of the year on my transmission, but I tried 7/16 bolts and they fight nice and tight and snug up nice, so i'll take it and not look the gift horse in the mouth!


Sunday, August 2, 2015

Engine and Transmission mounted

Both mounted, hopefully in their final resting position.  I think I got enough room to squeak the steering linkages by, drivers side exhaust manifold is fine, however passenger side is a little tight, not sure what i'm going to do over there yet.  The 2X4 represents the firewall location in these pictures.


Saturday, August 1, 2015

Alot of new updates!

Alot of new updates, busy couple of days.  Got the rest of the front suspension on (minus the brakes).  It's amazing how much 4 wheels makes it start to look like a car!
So after I got the car to that point, I turned my attention back to engine.  Lifted it up off of the engine stand using hoist, replaced final two freeze plugs in back of engine and attached flexplate, starter, and transmission.


A little tricky getting the torque converter pushed all the way in, getting both lined up and then bolting torque converter to the flexplate, but its all done!

After that it was time to lift it up and get the car close to position to start to plan where this engine is actually going to go.


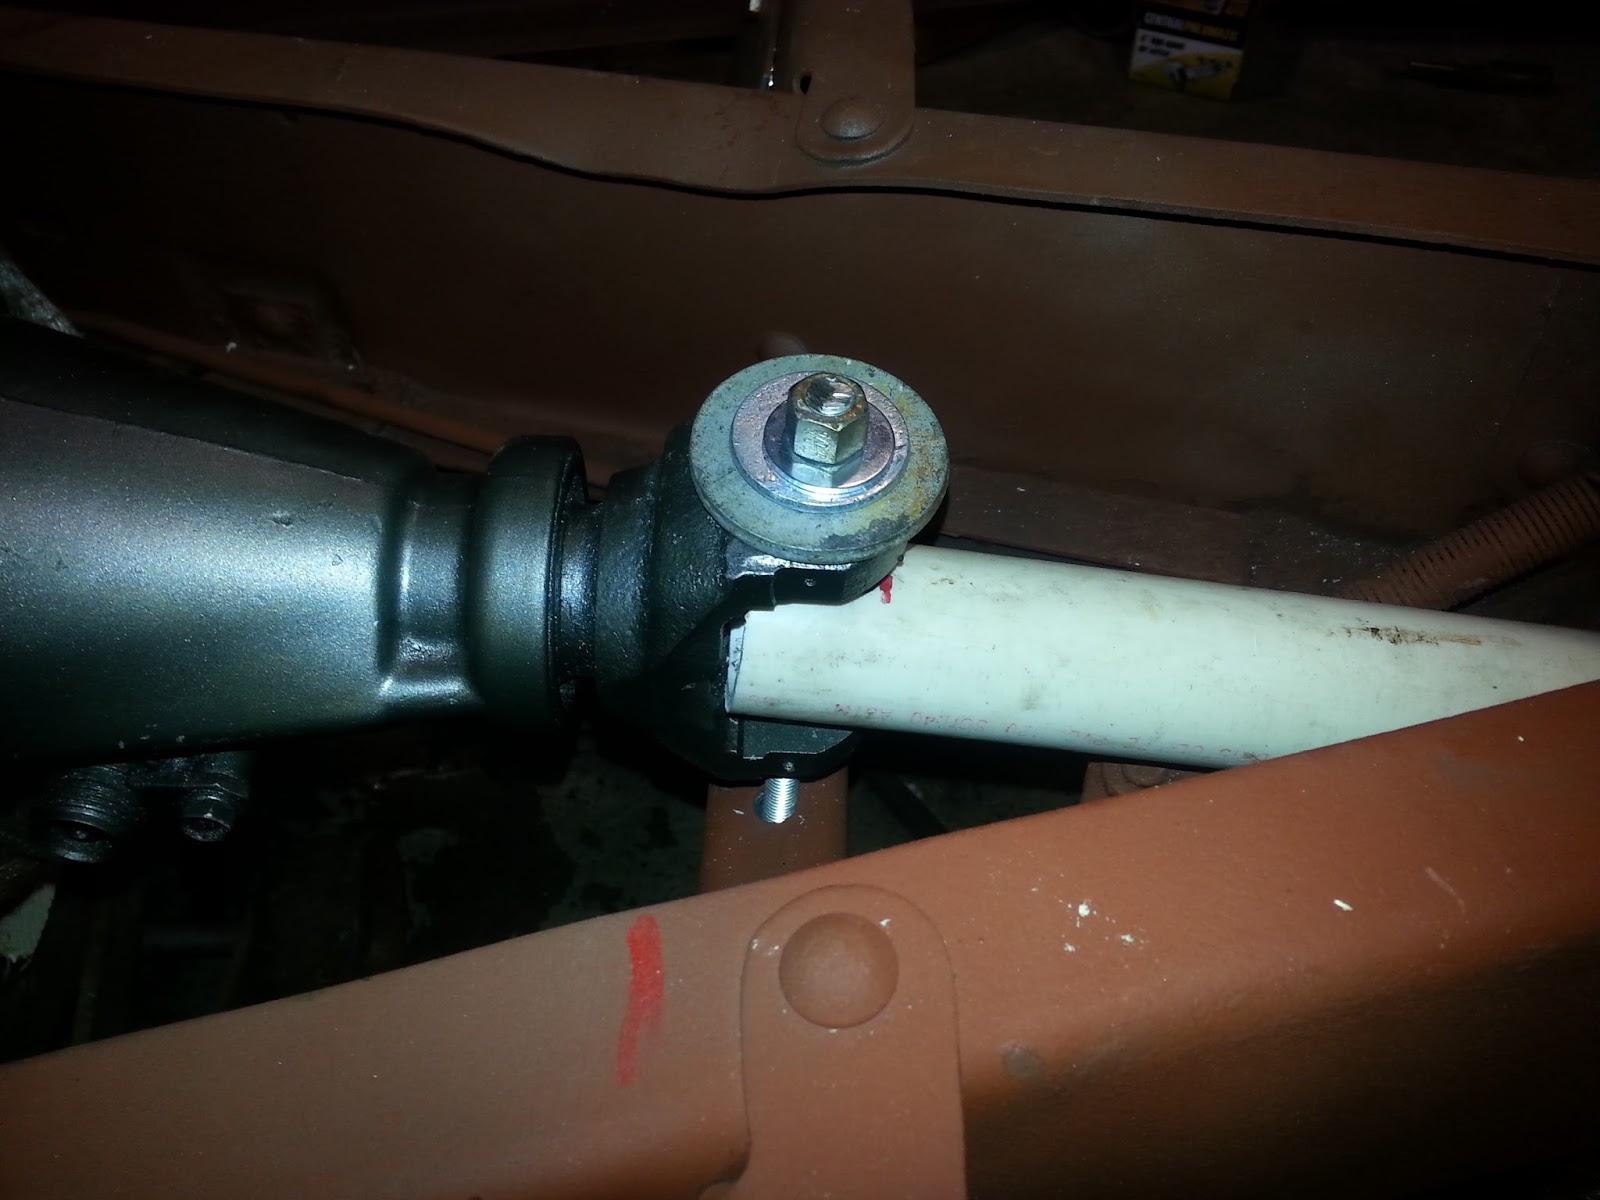
At this point I knew I needed to have it fairly close to the radiator (for the fan, etc.) however I wanted it back as much as possible for stability and better drive-ability.   I took some measurements off of the body mount holes and the body and made a mock firewall out of 2X4's (the bottom 2X4 is where the firewall takes a diagonal towards the back).  I also ran an 1.5" pvc pipe from transmission to diff to simulate driveshaft.  Fits pretty well, i'm also trying to figure out engine height and transmission height.  I lastly put the steering rack in so I can make sure I think I have enough room to get around the engine with my steering shaft.


Spoke with Bob tonight, and he recommended that before I finalize the engine location, I figure out my steering column location and headers location and make sure its all happy with where I currently have it.  A torpedo level on the engine lifting plate has it perfectly level (which I guess will put the engine at the correct pitch).  I checked my pinion angle and it is sitting right around 2.5 degrees so I think that will be good.  More to come!

Thursday, July 30, 2015

Front End going in!

So the front end is starting to go in, got the drivers side lower/upper control arms, spring/shock, and spindle installed.  What a pain compressing that spring (thanks for the idea of making my own spring compressor Bob!)!!  Putting a jack under the lower arm and compressing the spring, I was able to get the spindle nuts started, however to get the upper shock bushings and nuts started, I had to put put 500lbs almost directly above the spring hat (200lbs of sand blasting sand and me).